Why Professional Help Beats DIY
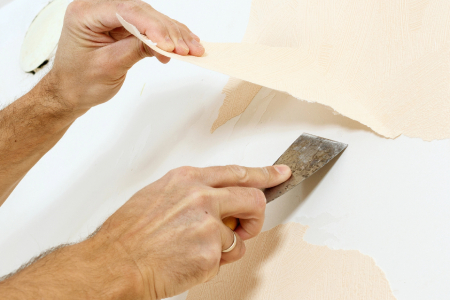
Pulling off a test corner can make removal look easy, but the surprises start fast. Professional techniques save time and prevent expensive touch-ups later. With trained prep, you avoid torn paper facing on drywall, blistered plaster, and lingering paste that ruins fresh paint.
- EPA Lead Certified crew follows lead-safe work practices on homes built before 1978
- Right method, from score-and-steam to controlled soak, chosen after on-site testing
- Dust containment and daily cleanup to keep living areas usable
- Repairs and priming done in sequence for durable results
How Our Process Works From Start To Finish
We begin with a short walkthrough to identify wall substrate, paper type, and adhesive. A small test area tells us whether to steam, soak, or combine methods. We then protect floors and nearby surfaces with drop cloths, plastic, and painter's tape. Outlets and switches are covered and power plates removed for a clean edge.
Next, we loosen the top layer if present, open seams to allow solution or steam to reach the paste, and lift paper in manageable sheets. Residual glue is rinsed and wiped until the wall is squeak-clean. Where paper facing has delaminated, we patch and skim. After a final dry time, we seal with a bonding or stain-blocking primer suited to the surface and future topcoat. Tip for homeowners: run bathroom fans, crack a window for airflow, and keep room temps moderate to help walls dry evenly after removal and priming.
Local tip: In Pasadena & the San Gabriel Valley, older bathrooms and kitchens often have multiple wallpaper layers. Budget a little extra time for testing and staged removal. Choosing removal during cooler months can also reduce paste reactivation from heat, which helps the primer cure more consistently.
Wallpaper Removal Services
Whether you are prepping for a full interior painting or refreshing a single room, we tailor the scope to your project. For light-duty jobs, we can remove paper, rinse residue, and prime so your wall is paint-ready. For heavier projects, we include skim coating, texture matching, and sealing to blend with adjacent walls. We also coordinate with our painting team when you are ready for color, so the transition from prep to finish is seamless.
We are a painting contractor, so our removal plan anticipates what paint needs for long-term adhesion. That means neutralized walls, moisture-aware primers, and the right sheen to handle everyday traffic. If you are working around cabinets or tight spaces, we stage the order of rooms to keep your home functional while work progresses.
Surfaces And Situations We Handle
Homes across the region include a mix of original plaster, newer drywall, and areas with texture or paneling. We prepare each surface so it accepts primer and paint without flashing or telegraphing old seams. Our crew is trained to protect delicate plaster and to perform drywall repair that looks like the damage was never there.
We also solve tricky scenarios that slow down DIY projects. Fabric-backed vinyl often leaves a stubborn liner. Older foil wallpapers can trap moisture and create bubbling if rushed. With the right combination of scoring, dwell time, and temperature control, we remove coverings at the paste line and leave the surface flat and ready.
- Single and multi-layer wallpaper, including painted-over coverings
- Powder rooms and baths with higher humidity and ventilation needs
- Kitchens with grease or cleaning residue that require extra wall prep
- Accent walls with heavy textures that must be feathered and matched
- Entryways and stairwells where safe access and protection are essential
Care tip during removal week: avoid hot showers in recently prepped rooms and hold off on wall-mounted hardware until the primer has fully cured. This simple step keeps new coatings from flashing or scuffing.